Tree Pose Yoga: How to Do It, Variations & Beginner Tips

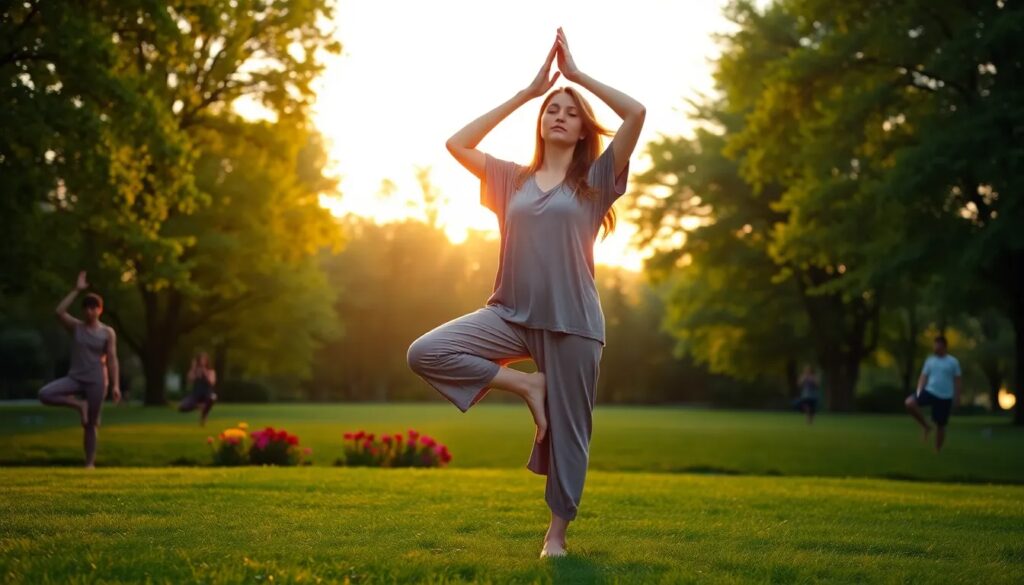
Tree pose yoga — Vrksasana in Sanskrit — is the standing balance most often taught first because it scales so well: you root one leg into the floor, press the sole of the other foot against the inner standing leg, and balance with the hands at the heart or overhead like branches. It trains the stabilizers of the foot, ankle, and hip that protect you in daily life and other sports, and the fixed-gaze, steady-breath requirement makes it a genuinely effective single-pointed concentration exercise. Below is how to set it up correctly, what most commonly goes wrong, how to adapt it to your level, and the beginner modifications that make the pose accessible from day one.
What tree pose yoga actually is
Vrksasana is a one-legged standing balance named for the obvious visual: the standing leg is the trunk, the lifted foot and bent knee form the root system, and the arms are the branches. The Sanskrit breaks down simply: vrksa means tree, asana means pose. Most lineages teach it in the standing portion of a class, after Mountain Pose (Tadasana) and before the seated work. The pose trains balance in three places at once — the standing foot, the hip of the lifted leg, and the gaze — which is why it appears in beginner classes and advanced sequences alike.
How to do tree pose, step by step
- Start in Mountain Pose (Tadasana): feet grounded, weight even, crown of the head reaching up.
- Shift your weight into one foot. Spread the toes and feel three points of contact: big-toe mound, little-toe mound, heel.
- Lift the other foot and place the sole against the inner ankle, calf, or upper thigh of the standing leg — anywhere except directly on the knee joint, where sideways pressure can strain the ligaments.
- Press foot and leg into each other. The mutual pressure is what stabilizes the pose — the lifted foot pushes in, the standing leg pushes back.
- Level your hips and gently open the bent knee out to the side without letting the standing hip hike or the pelvis twist.
- Bring your hands to prayer position at the chest, or extend the arms overhead like branches.
- Fix your gaze (drishti) on a still point at eye level, and breathe steadily for 5–10 breaths.
- Release with control and repeat on the other side.
The mistakes that break the pose
- Foot on the knee. The most common and the most important to fix — place the foot above or below the joint, never on it.
- Hip jutting out over the standing leg. Keep the standing hip stacked over the ankle; it is better to lower the foot than to sink into the hip.
- Wandering gaze. Balance follows the eyes. A fixed point at eye level steadies the pose more than leg strength does.
- Holding the breath. Tension rises and balance degrades; smooth breathing is part of the technique, not a bonus.
- Collapsing when you wobble. Wobbling is the training. The micro-corrections happening in the ankle and foot are exactly what strengthens your balance over time.
Tree pose yoga for beginners
The pose counts at every height of the foot, which is what makes it the first balance most teachers introduce. If the full expression feels out of reach, work through these tiers in order:
- Toe-on-floor tree. Heel rests on the standing ankle, toes stay on the floor like a kickstand. This is the legitimate beginner version — the standing-leg work, gaze, and breathing are all already in play.
- Wall-supported tree. Stand an inch from a wall, fingertips or the back of the hand resting lightly on it. The wall is a safety rail, not a crutch: the goal is to need it less over weeks, not to lean.
- Foot to the inner calf. When the foot-to-ankle and foot-to-calf positions both feel steady, you have enough control to bring the foot higher. Skip directly to the thigh only if the calf position is genuinely easy.
- Hands at the heart, not overhead. Hands in prayer at the chest keep the center of mass lower and the shoulders relaxed, which buys a beginner several breaths of stable balance. Overhead arms are a finish, not a starting point.
Two practical points that help at any level: practice barefoot on a firm surface, because thick cushioned mats make balancing harder, not easier; and set up the standing foot deliberately before lifting the other — rushed setup is the main cause of early wobbles. Expect asymmetry: almost everyone has a steadier side. Practice both anyway, and prefer fewer breaths with level hips over long holds with a jutting hip. If you want a more accessible starting point because of injury, vertigo, or limited mobility, our guide to seated yoga poses covers how to train the same hip-opening and concentration work from the floor, and chair yoga for beginners covers the standing-side version with support.
Tree pose yoga variations by level
| Variation | How | Level |
|---|---|---|
| Toe-on-floor tree | Heel rests on the standing ankle, toes stay on the floor like a kickstand | Beginner |
| Wall-supported tree | Practice beside a wall, fingertips or back lightly touching | Beginner |
| Classic tree (foot to calf) | Sole pressed to the inner calf, hands at heart | Beginner–intermediate |
| Foot to upper thigh, arms overhead | Full expression with arms reaching toward the ceiling | Intermediate |
| Half-lotus foot | Lifted foot rests in the hip crease, half-lotus shape, knee opens wide | Intermediate |
| Eyes-closed tree | Same shape, vision removed — dramatically harder | Advanced |
| Tree with side bend or twist | Adds spinal movement from the rooted base | Advanced |
Two extra variations worth knowing: a supported arm position — one hand on a wall, the other overhead — lets you work on the hip opening and the overhead arm line separately; and a narrow base tree, with the standing foot directly under the hip rather than at a slight angle, is a subtle but real way to make an intermediate version harder without changing the leg position. Our roundup of yoga balance poses shows where to go next if you want to keep building on this family of postures.
What tree pose actually does for you
The benefits are concrete rather than mystical: it strengthens the small stabilizers of the standing foot, ankle, and hip — the muscles that protect you in daily life and other sports; it trains proprioception, the body’s position sense, which is one of the systems that declines as we age and that this pose directly exercises; it engages the core to keep the pelvis level, complementing the work in our yoga for core strength guide; and the fixed-gaze, steady-breath requirement makes it a genuinely effective single-pointed concentration exercise. In some traditions, tree pose is associated with the crown (sahasrara) chakra, with the rooted foot and the upward-reaching arms standing in for groundedness and clarity at the same time — a cultural note rather than a clinical claim, and one you can take or leave.
For context on where tree pose sits in the broader difficulty spectrum, see our look at the hardest yoga poses — balance postures scale further than most people expect, and tree is the gateway.
Safety and contraindications
This article is general information, not medical advice. If you have a recent or chronic injury to the ankle, knee, or hip, balance disorders, low or high blood pressure affected by overhead work, or significant osteoporosis, check with a healthcare professional or qualified teacher before practicing balancing poses, and use a wall or chair for support.
Two practical points that matter for safety: keep the lifted foot below the knee or above it, never on it — direct sideways pressure on the knee joint is the one placement to avoid; and lower the foot to the ankle or use the wall at the first sign of strain, because holding a wobbly tree with a hiked hip and a locked knee is a faster path to injury than stepping out of the pose. Beginners often do better with a basic setup — a firm mat, a wall within reach, and a block nearby for the hand-to-floor modifications — than with no support at all.
As an Amazon Associate, we earn from qualifying purchases.

- Natural Cork: Elevate your yoga practice with our eco-friendly, non-slip Gaiam Cork Yoga Brick, perfect for yoga, Pilates, and more.
- Modify Your Poses: Ideal for all skill levels; shorten or deepen your stretches effortlessly. Dimensions: 9"W x 5.5"H x 3"D, lightweight at 1.5 lbs.
- Rounded Edges & Superior Grip: Designed for your comfort, the rounded edges and textured surface provide excellent grip and control during challenging poses.
- Perfect Dimensions: Measuring at 9"W x 5.5"H x 3"D, this yoga brick provides ample support for optimal alignment and posture.
- Versatile & Portable: Compact and lightweight, this cork yoga brick is your go-to fitness accessory for home or gym workouts.

Frequently asked questions
Against the inner ankle, calf, or upper thigh of the standing leg, wherever you can hold steady alignment. The only placement to avoid is directly on the knee joint, where sideways pressure can strain the ligaments.
Usually one of three things: a wandering gaze, weight not fully committed to the standing foot before lifting the other, or held breath creating tension. Fix your eyes on a still point, set the standing foot deliberately, and keep breathing.
Five to ten steady breaths per side is a solid practice target, roughly 30 to 60 seconds. Shorter holds with level hips and a calm breath are more valuable than long holds with collapsing form.
Yes. It is one of the first balance poses taught because it scales so well: beginners can keep the toes on the floor or practice beside a wall and still get the full benefit of the balance training.
Vrksasana, from vrksa (tree) and asana (pose). The name describes the shape: the standing leg is the trunk, the lifted foot and bent knee are the roots, and the arms are the branches.
Have a correction? Contact us.
Last update 2026-09-10. Price and product availability may change.
Recommended: